Posts

Showing posts from 2012

Rustic side table

Image
Could you say no to this little side table? We found it while driving up to look at another venue for our wedding next year. Across the street from the location was a Thrift store and we just had to stop and go in. Strolling around I stumbled across this little guy. It was marked at $12.91 and before anybody could even think about taking it home, we carried it to the cash register. It has such a nice farm house style. I sanded and painted it with my favorite of all time color, Heritage Park from Behr.   After it was dry I used Martha Stewart's black coffee glaze and wiped it all over the surface.   Let it dry for a couple minutes then wiped it off so that it came out with that old rustic beautiful  look.  When it was all done, I thought it needed something else. I used chalkboard paint for the top to give it some more charm. And here is the before and after.  Now it is on craigslist waiting...

Side table redo

Image
Not sure what it is with me, but I'm in love with old tables and chairs. I just love re-doing them. My hands start to itch, just thinking about the possible ways to re-do them. We found this side table at a thrift store last weekend. It was $12.50 and I REALLY needed to take it home. I'm riding on the back of the train when it comes to ways to refinish furniture. This is my first (and definitely not last) project where I used glaze. It is so easy and has such a great appeal to this little table.    After sanding and putting two coats of Behr Heritage Park paint on (I'm obsessed with that color) I let it dry. Then I used Martha Steward's black coffee glazing and painted it all over the table, let it sit for a minute or two and started wiping it off. It gave the table an old rustic look and I'm completely in love with it. I wanted to sell it, but I might just hold on to it! :) Thank god we have a pretty big house with lots of room for all my finds. ...

Chalkboard Update

Image
Yesterday at the Good Will... Always looking for projects, I went to our local Good Will store. Looking for anything wedding and found this little guy. A little chalkboard, dirty as can be, but for $1.91 not to beat. I also found 5 mason jars for $0.90 each. When I got home I tried to clean it up, but nothing came off. I painted both sides three times with chalkboard paint, letting it dry in between. The paint on the dry erase side didnt stick and came off right when I took off the painters tape. When taking the dry paint off though, underneath came out totally clean. :) After the inside of the boards were clean I painted the white outside parts with a fresh coat and for just $1.91 and couple hours of work it was totally worth it. I "seasoned" the chalk side with chalk wiped both sides clean I can see this in use for our upcoming wedding next year. It could be a cute little "save the date" sign. SO MUCH ...

Thankful

Image
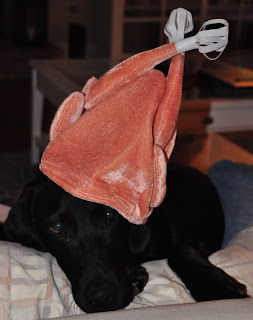
Today I started the day off with being a newly Fiancee. Very happy on this Thanksgiving day and couldn't ask for a better day to be proposed to. Brians mom, Bj and Tony (my american parents) and Tony's mom spent the day with us. We had a wonderful dinner and an excellent time.   Our menu: Rolls                                    Cranberry Sauce                                          Turkey smoked in apple bbq chips on our green egg   Green Bean Casserole Sweet Potato Casserole                  ...

Wardrobe Update

Image
A little wardrobe update was needed. After cleaning up all of my fabric, I found several pieces I wanted to work with. Since I tried to sew several dresses in the past and non of them were anywhere near wearable, I didnt even bother taking pictures along the way. It turnes out I made three pieces which might be worn more than ones. My new 3 colored purple dress a black and white polkadot skirt                                    and last but not least a yellow dress                                       I'm getting a little more confident and already have some red fabric laying on the floor, ready to take s...

A Girl needs a Pearl

Image
Floating around on the internet I found instructions on creating a pearl ring. Of course I have no idea any more where I found it, but it was stuck in my head. So when coming home I went into my craft room and sorted through some boxes. I found a pearl, some wire, grabbed a wooden stick (which I think is to fix holes in socks) some scissors and a pair of pliers. I cut about 20" of wire, feed the wire through the hole of the pearl and stop in the middle of the wire. Take your wooden stick and lay the wire around two times on each side. Take it off and try it on to see if you need to make it tighter or bigger. When you found the right size, start to wrap one side of the wire around the pearl a couple times and end it by wrapping the leftover wire on one side. Make sure it is really tight. Use your pliers to tighten it up. Wrap the other side of the wire around the other side of the pearl to get the ring part tight, and done. Such an easy project, it took 5 minutes and...

New Pillows for the Fall

Image
Cooler ( 78Degrees) rainy weather made me think of new pillows for the fall. Collected left over fabric from our exhibitors in New York turned to 9 different style pillows for the Formal - and Living room.   It took one rainy sunday to make it all happen. All of them are envelope pillows with different front and backs to switch out easily to either change or wash them. Number 1                                                Number 2 Number 3 and 4  All 4 new pillows piled up for the formal living room Then we have some more for the living room, including the two I made the day before. So actually I have 11 new ones in total! :) ...but who is counting. Number 5 and 6 Number 7 and 8 ...